

NFTs.
I’m sure if you’re reading this, you know that NFTs are absolutely everywhere these days. Newly generated collections are created and shipped at an astonishing rate, however many of these collections are stored in… let’s just say, not the most ideal way possible.
The Problem
At a fundamental level, an NFT is simply what it stands for - A non-fungible token. This token is a piece of data stored on the blockchain, that data points to some more data via a link, and that data finally points to your NFT image. Neat, right?
A lot of these collections however, currently rely on centralized hosting for their images and metadata. The problem with this is that the owner has full control over the content being hosted. Meaning if their server goes down, or someone tries to alter them — poof. That token now references a dead link, nothing.
Absolutely the worst method for storing NFTs.
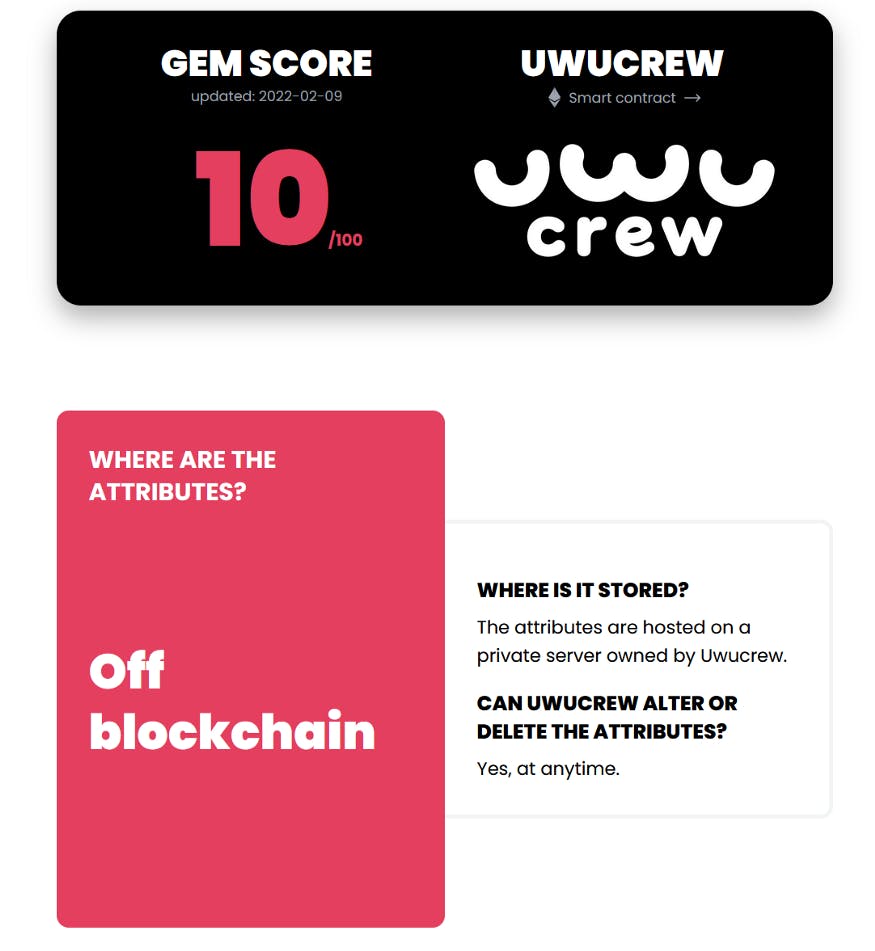
You can see below a popular collection, uwucrew, with a very centralised hosting system.
Using IPFS
Better than storing your NFTs on some centralised server, is to do what the majority of collections now do — and use IPFS.
IPFS is a peer-to-peer file sharing protocol, more akin to old-school torrenting. As long as there is a peer with your data, it will be available and readily accessible. IPFS, however, also suffers from an issue which makes it somewhat problematic for hosting NFT collections.
The problem in question is what is known as garbage collection.
If and when IPFS deems your content unnecessary, it will be 'garbage collected'. This is a process where IPFS automatically removes content from storage, in order to free up resources for higher priority files. Fortunately this can be avoided by ‘pinning’ your content through a service such as Pinata, but then we’re back to square one — Relying on a node to keep it pinned, or having to consistently pay said node to prevent your data from being garbage collected.
Enter: Arweave
Arweave is a blockchain derivative that solves essentially all of the problems mentioned above. To put it simply, the two biggest reasons I would recommend Arweave over any other storage option are:
- One-time fee
- Incentivized nodes.
The second point is incredibly important here. IPFS nodes have no incentive to keep your content pinned. In fact, you have to continually pay for this privilege whereas with Arweave you pay once, and nodes are paid in $AR to keep your content up. As long as Arweave lives, so will your content. No hassle.
Additionally, there is no singular person who can suddenly revoke access to a collection, tamper with the data, or rely on a single point of failure (a centralized server).
This provides incredible value to anyone creating an NFT collection, be it generative or 1/1 art pieces for a couple of reasons.
Firstly, the project owner can have peace of mind their hard work is permanent and easily accessible.
Secondly, this provides brilliant buyer safety, increasing the levels of trust between you and your current holders or any potential holders. Unfortunately, the nature of unregulated tokens mean that there are a lot of scams, rug-pulls and general skepticism around newer projects.
Being able to tell your buyers "hey, your NFT data is stored here, and it always will be stored here" is a great way to gain buyer confidence.
Okay, So How Do I Do It?
The best way (in my opinion) to upload your files to Arweave, is through ArDrive. ArDrive is kind of like the OneDrive or Dropbox of Web3, where you can have drives, folders, files all neatly organized with your metadata and images for your NFTs (or anything else, for that matter!)
If you're uploading singular pieces of art, the process should be fairly straight-forward where you simply link your ArDrive file to the token of your choice. Nice and easy!
If you're working with generative collections, the process is a little more complex. I have a comprehensive video walking you through the entire process here.
If you prefer to read than watch videos, you can follows these steps:
1. Formatting Metadata
The first step is to check that your metadata is formatted correctly, so that when you upload your images and metadata they will be fetched correctly by third-parties (e.g. OpenSea).
Your metadata files should look something like this:
{
  "name": "Punk #1",
  "description": "A description of a punk",
  "image": "https://arweave.net/baseURI/1.png",
  "edition": 1,
  "attributes": [...]
}
The important key to look at here is "image", as this is the link to where your image is stored. The baseURI will be a unique identifier we can get once we've uploaded our images to ArDrive, and will be the same for all of our images, so they can easily be accessed as https://arweave.net/<hash>/1.png, https://arweave.net/<hash>/2.png and so on, and so forth. If you've ever used IPFS, this should sound familiar.
It's also worth mentioning you can use the ar://<hash>/1.png format for your images and metadata, however this is currently only known to be supported by OpenSea.
Creating and Funding a Wallet
The next thing you will want to do is create an ArConnect wallet. This is a browser extension similar to MetaMask, except for $AR and Arweave PSTs (Profit Sharing Tokens). Create a wallet, note down your seed phrase somewhere safe, and save the keyfile.
Before funding your wallet with some $AR, you can calculate how much it will cost to upload your collection to Arweave. Head to the ArDrive fee calculator to get an estimate of how much you will need.
Get some $AR tokens from your favorite exchange, or use a faucet if you need a little free $AR. I always recommend buying a little bit more than you intend to use to cover withdrawal fees or an other extra costs. Now we're ready to upload!
Upload Your Images
Head to ArDrive, sign in with your ArConnect wallet, and create an ArDrive account. You should be greeted with a screen similar to the one below.👇
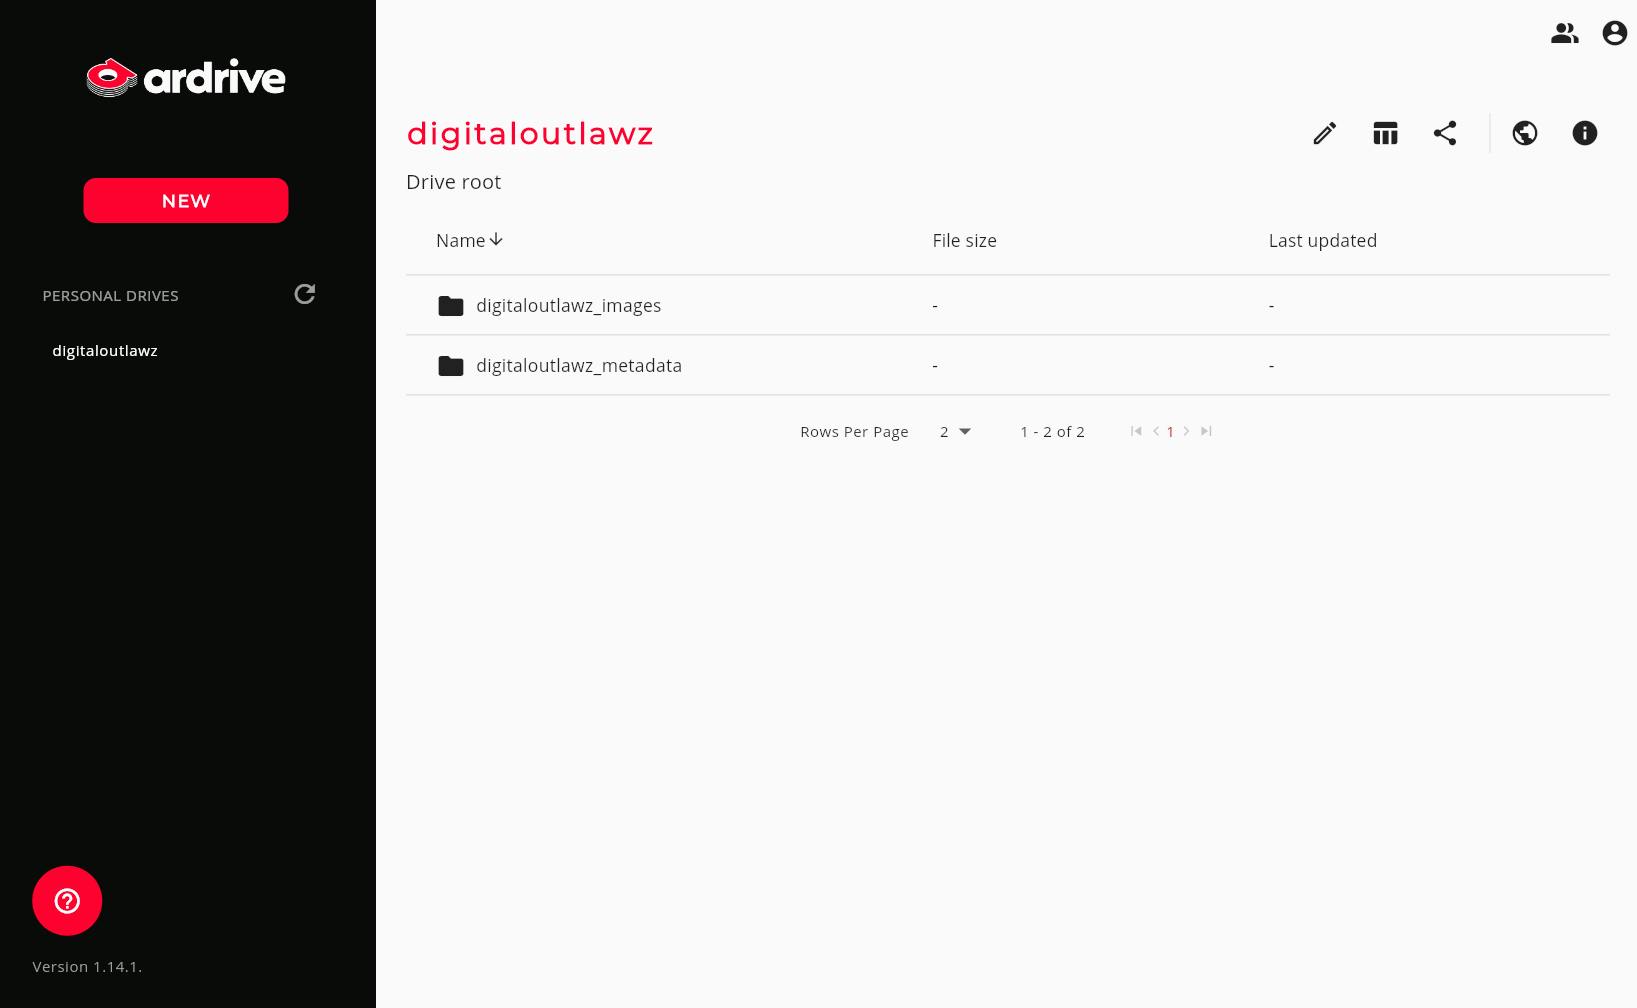
From here you can go to new ➡️ upload folder ➡️ and create a new folder for your images. At this point we only upload the images, as we need to get the identifier for them to update our JSON metadata files.
Make sure to mark this folder as public, as the images need to be fetched by other users/third-parties.
Add all of your images and approve the transaction — You can keep an eye on its progress on viewblock, a block explorer for Arweave by entering your bundle transaction ID.
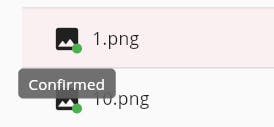
It's important to make sure these are all fully uploaded before moving on to the next step, as this is where we will create a file that gives all of our images the same identifier.
I recommend waiting for ~15 block confirmations on ViewBlock to be certain, and make sure all of your images are marked as 'confirmed' on ArDrive.
Creating a Manifest
Now all of your images are uploaded, you can create a manifest which will bind all of the images to the same id.
Navigate to your images folder, and go to 'new' once again. This time choose 'create new manifest'. Make sure that you are creating this manifest inside the images folder, not on a drive root level.
Updating Your Metadata
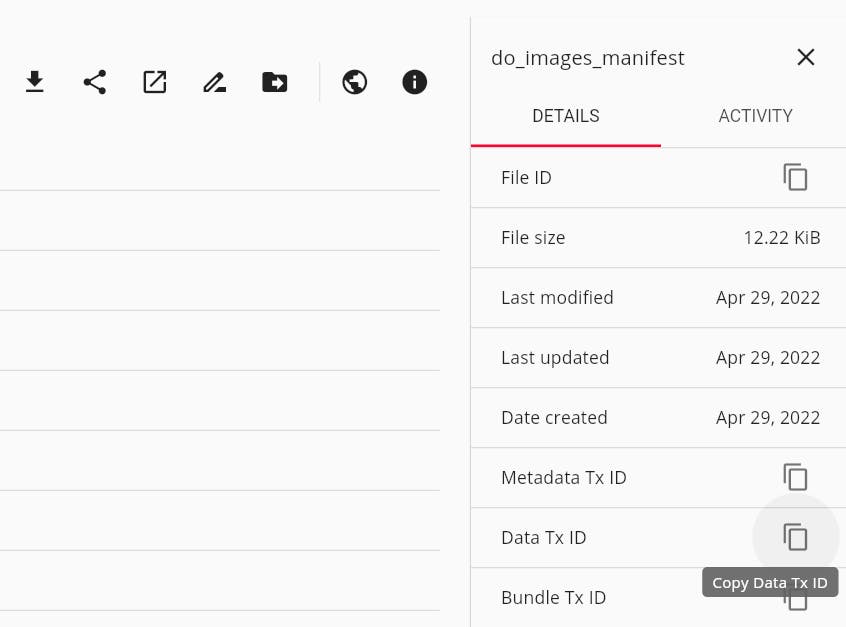
Once your manifest is confirmed, double click it and copy its Data Tx ID.
This is what you will replace your baseURI with in your metadata files, which should afterwards should look something like this.
{
  "name": "Punk #1",
  "description": "A description of a punk",
  "image": "https://arweave.net/o8eyC27OuSZF0z-zIen5NTjJOKTzOQzKJzIe3F7Lmg0/1.png",
  "edition": 1,
  "attributes": [...]
You can even copy my link to check the image!
Updating The JSON Metadata
So now your images are uploaded and you have a manifest created for them, all you have to do is follow almost the exact same process for your metadata.
- Create a new folder (make sure it's public)
- Upload the newly updated metadata files
- Create a manifest (inside the metadata folder)
You can then use the Data Tx ID for your metadata manifest to plug into a smart contract and generate your tokens!🚀
That's It!
I hope you learnt something new about Arweave in this post, or helped you understand how it is possible to upload a generative NFT collection to AR using ArDrive.
If you want to see more content from me or connect with me, check out my profile for my socials.
Take it easy, folks.
felwintrr